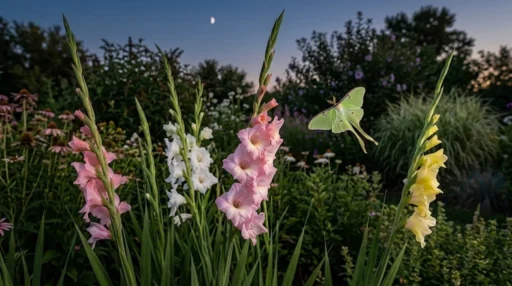
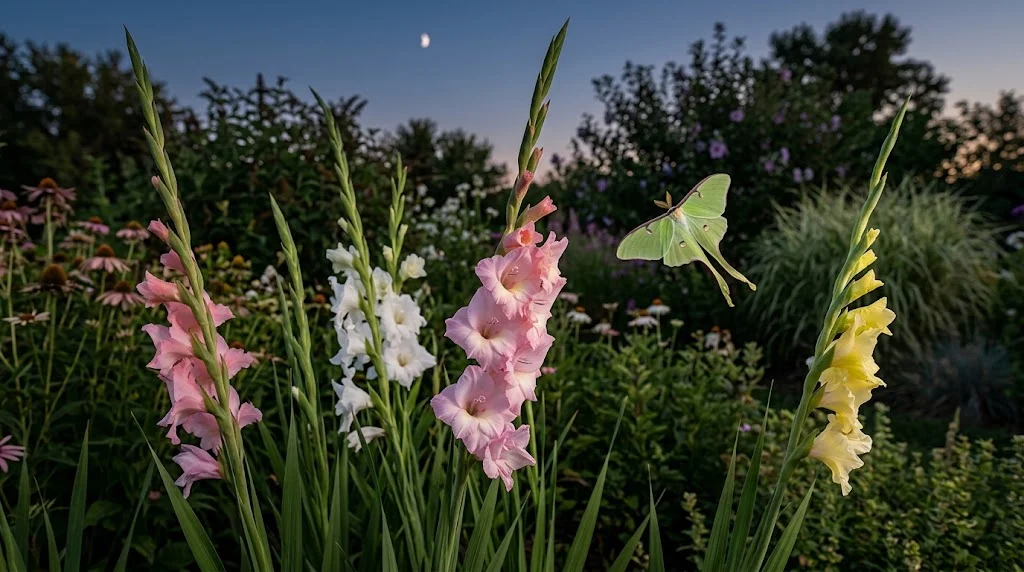
Few flowers command attention in a midsummer border quite like gladiolus. Tall spikes lined with individually unfurling, funnel-shaped blooms in colors ranging from bold to subtle bring both structure and vibrancy to a garden, and they make an equally striking cut flower arrangement. The care itself is refreshingly simple: full sun, and rich, moist, well-draining soil. It’s remarkable how a single bulb can grow into a plant tall and dramatic enough to turn heads all season long.
Sometimes called “sword lilies” for the shape of their leaves, gladiolus belong to the iris family (Iridaceae) and grow from specialized underground stem structures called corms. Technically, corms aren’t bulbs at all. They’re thickened stem tissue that stores the nutrients powering the plant’s spring and summer growth.
At Solera Gardens, we believe great gardening results come down to the right know-how. Here’s everything you need on planting gladiolus, prepping soil, planting depth, summer watering, and winter storage.
How Do You Plant and Care for Gladiolus?
Happy gladiolus start with recreating their native South African and Mediterranean climate: warm, sunny, and exceptionally well drained. As tender perennials, your success largely depends on your USDA zone. Gardeners in milder climates can leave corms in the ground all winter, while those in colder regions need to treat gladiolus as annuals or dig up the corms each fall for storage.
Getting this right starts with good planning, the right planting site, and a solid understanding of the corm’s life cycle. Here are the basic growing conditions that lead to reliable blooms.
Botanical Overview and Plant Characteristics
Before planting your first corms, it helps to know a bit about the modern gladiolus hybrid.
- Botanical Name: Gladiolus x hortulanus (syn. Gladiolus hybrids)
- Common Names: Gladiolus, glads, sword lily
- Plant Type: Herbaceous deciduous perennial, grown from corms
- USDA Hardiness Zones: 7 to 10 (hardy); 2 to 6 (grown as annuals or lifted for winter)
- Sun Exposure: Full sun, 6 to 8 hours of direct light daily
- Soil Type: Sandy loam, rich, and consistently well draining
- Soil pH: Slightly acidic to neutral (6.0 to 7.0)
- Mature Height: 2 to 5 feet, depending on variety
- Mature Spread: 6 to 12 inches
- Bloom Time: Midsummer through frost, typically 70 to 90 days after planting
- Toxicity: Toxic to dogs, cats, and horses due to systemic saponins
Understanding Gladiolus Growing Requirements
Gladiolus is fairly low maintenance compared to many perennials, but there are a few non-negotiable conditions needed for strong, upright stems and fully packed flower spikes.
Light Requirements: The Power of Full Sun
Gladiolus is a genuine sun worshipper, needing at least six to eight hours of direct light daily. You can technically grow it in partial shade, but the results tend to disappoint: weak, leggy stems stretching toward the light and sparse spikes with dull flowers. Choose a planting spot entirely clear of shadows cast by trees or buildings.
Soil Dynamics: Drainage Is Paramount
Nothing kills a gladiolus corm faster than sitting in soggy, oversaturated soil. Wet conditions invite fungal rot before the plant even has a chance to break the surface.
- The ideal mix: A loose, free-draining loam amended with organic matter.
- Clay soil solution: Consider a raised bed if your soil is heavy clay, or work in generous amounts of compost, aged manure, and coarse sand to improve drainage.
- Sandy soil solution: Light, sandy soil drains too fast and loses nutrients quickly, so mix in plenty of compost to help retain both moisture and nutrition.
Temperature and Humidity Constraints
Gladiolus needs warm summer weather to perform well. Don’t rush corms into the ground before all danger of frost has passed and the soil has warmed to around 55°F. In humid climates, watch for leaf fungus and space plants generously to keep air moving freely between them.
When to Plant Gladiolus Corms
Timing depends largely on your last spring frost date and when you’d like to see blooms.
Spring Planting Windows
Plant corms once the ground has warmed enough to work.
- Cold climates (zones 2 to 6): Typically mid to late May, about two weeks after your average last spring frost.
- Warm climates (zones 7 to 10): Planting can start as early as late March or early April, once winter frost has cleared.
The Staggered Planting Strategy
Planting all your corms at once means they’ll all bloom within roughly the same 10 day window in midsummer. A better approach is staggering plantings from late spring through early summer, adding a new batch every 10 to 14 days, generally through the first week of July. This spreads the bloom season out over several weeks instead of just one.
| Planting Batch | Planting Time | Expected Bloom Time | Purpose & Benefit |
| Batch 1 | Mid-May | Mid-July | Starts the season with the earliest blooms as summer begins |
| Batch 2 | Late May | Late July | Extends the bloom period roughly two weeks past the first batch |
| Batch 3 | Early June | Throughout August | Keeps the garden vibrant with a fresh wave of blooms midsummer |
| Batch 4 | Mid-June | Late August to September | Delivers late-season color well into early autumn |
| Planting Interval | Every 10 to 14 days | — | Prevents all flowers from blooming at once for a longer display |
How to Grow Gladiolus Bulbs and Corms: Step-by-Step Planting
Getting the planting process right makes growing gladiolus genuinely enjoyable. Here’s the full walkthrough.
Step 1: Selecting High-Quality Corms
Look for corms that are full, heavy, and firm. Skip anything light, hollow, mushy, moldy looking, or dry and withered. Larger corms, at least an inch to an inch and a quarter in diameter, tend to produce fuller, more impressive flower spikes than smaller, stunted ones.
Step 2: Soil Preparation
Dig a hole roughly 8 to 10 inches deep. Loosen the soil at the bottom and work in a 2 inch layer of well-rotted compost to improve structure and fertility.
Step 3: Depth and Spacing Rules
Planting depth matters here, since deeper planting helps anchor the heavy, top-heavy flower spikes as they grow.
- Large corms: Plant 4 to 6 inches deep.
- Small corms: Plant 3 to 4 inches deep.
- Spacing: Space individual corms 4 to 6 inches apart, or plant in clusters of 10 to 15 for a fuller, more dramatic effect.
Step 4: Positioning the Corm
Place the corm pointed side up, with the flat basal end, where roots will emerge, facing down. If you can’t tell which end is which, don’t worry too much. The plant will usually sort itself out either way.
Step 5: Backfilling and Initial Watering
Fill the hole with soil, pressing down firmly to eliminate air pockets. Water thoroughly after planting to help the soil settle around the new roots.
Solera Gardens Tip: Put stakes in place at planting time, not later. Waiting until midsummer to stake means risking damage to the underground corm when you push a stake into soil you can no longer see clearly.
Watering and Fertilizing Guide
Strong stems and vivid, healthy blooms depend on the right balance of water and nutrients. Both overwatering and overfertilizing can cause real problems, so moderation is key.
| Care Task | Recommendation | Purpose & Benefit |
| Watering Routine | About 1 inch (2.5 cm) of water weekly, from rain or irrigation, applied deeply at the base | Encourages deep roots, better drought tolerance, and sturdy stems |
| Fertilizer Type | Low nitrogen, high phosphorus fertilizer, such as 5-10-10 or 10-20-20 | Promotes larger, more vibrant flower spikes without excess leafy growth |
| Application Timing | Feed when shoots emerge, and again as flower spikes develop; avoid feeding during peak bloom | Delivers nutrients exactly when the plant needs them most |
| Watering Frequency | Increase during hot, dry spells, letting soil dry slightly between waterings if drainage is good | Keeps soil moisture consistent without waterlogging the corms |
| Expected Results | Combine regular deep watering with phosphorus-rich fertilizer through the season | Produces sturdy stems, healthy foliage, and long-lasting blooms |
Strategic Watering Guidelines
- Deep over frequent: Water thoroughly once or twice a week rather than giving a light daily sprinkle. Deep watering encourages roots to grow downward, resulting in sturdier plants.
- Avoid wet foliage: Water at the base using a soaker hose or drip irrigation. Wet foliage invites airborne diseases like botrytis blight.
- Mulch application: Once plants emerge, add a 2 to 3 inch layer of organic mulch, such as straw, shredded leaves, or bark. This conserves soil moisture, moderates root temperature, and suppresses weeds.
Nutritional Support: Choosing the Right Fertilizer
Gladiolus are moderate feeders, but they’re notably sensitive to excess nitrogen.
- The nitrogen hazard: Avoid high-nitrogen lawn fertilizers or fresh animal manure. Too much nitrogen produces floppy, leafy growth that can’t properly support the flower spike.
- The ideal formula: Choose a fertilizer low in nitrogen relative to phosphorus and potassium, like 5-10-10 or 10-20-20.
- Application timing: Place granular fertilizer at the bottom of the planting hole, with a thin layer of soil between it and the corm. Apply a second round when plants reach 6 to 8 inches tall, and a third when flower buds first show color. Water after each granular application to carry nutrients down to the roots.
Harvesting and Pruning Guide for Floral Designs
Cutting your own tall spikes for indoor arrangements is one of the most rewarding parts of growing gladiolus, and using the right technique makes a real difference in vase life.
When to Cut Gladiolus Spikes
Timing matters here. Waiting until the entire stem has opened means the lowest buds will already be fading by the time the top ones open.
- The sweet spot: Cut once the bottom one or two florets have fully opened, while the buds above are showing color but still closed.
- Time of day: Cool hours, early morning or after sunset, are best. Cutting during the heat of the day can stress the plant and cause cut blooms to droop.
Professional Harvesting Technique
- Use a clean, sharp knife or bypass pruners sterilized with rubbing alcohol.
- Make a clean, diagonal cut near the base of the flower stalk.
- Leave at least 4 to 5 healthy leaves on the plant.
- Keep these leaves intact, since they continue photosynthesizing and storing energy in the corm for next year’s growth.
- Place cut stems immediately into a bucket of warm water.
- Condition the stems in a cool, dark room for a few hours before arranging.
- Keep gladiolus stems upright during both storage and display.
- Avoid laying stems flat. Gladiolus is strongly geotropic, meaning the tips will bend permanently upward against gravity if laid down, ruining their straight form.
Overwintering: Lifting and Storing Gladiolus Corms
In zones 2 through 6, gladiolus corms won’t survive a hard winter frost in the ground. To keep your favorite varieties year after year, you’ll need to dig up and store the corms over winter.
Step 1: Autumn Harvesting (Lifting)
Leave plants in the ground until after the first fall frost, which will darken or brown the leaves, signaling that growth has stopped.
- Loosen the soil around each plant with a garden fork, being careful not to spear or damage the corms.
- Grasp the base of the foliage and gently lift the corms and attached soil out of the ground.
- Shake off excess soil, but avoid washing the corms, since moisture encourages mold during storage.
Step 2: The Curing Process
Curing dries and firms the corm’s outer skin, helping prevent rot.
- Trim the leaves close to the top of the corm, leaving about half an inch of stem.
- Lay corms in a single layer in a warm, dry, well-ventilated spot out of direct sunlight, like a garage, shed, or covered porch.
- Let them cure undisturbed for 2 to 3 weeks.
Step 3: Cleaning and Dividing
Once fully cured and dry:
- Gently remove and discard the old, shriveled “parent” corm from beneath the new, plump “daughter” corm.
- Brush off papery skins and loose soil.
- Small, seed-like “cormels” may be attached at the base. These can be saved for future planting, though they typically take two to three years to reach blooming size.
Step 4: Storage Conditions
- Dust the cleaned corms lightly with an organic fungicidal powder to help prevent rot.
- Store in breathable containers, like net bags, paper bags, or shallow boxes with a layer of dry peat, vermiculite, or wood shavings.
- Keep containers in a cool, dark, dry space with a steady temperature between 35 and 45°F, such as an unheated basement, crawl space, or root cellar.
- Never let corms freeze, and keep them away from fresh fruits and vegetables, which release ethylene gas that can damage the flower buds inside the corm.
Designing with Gladiolus: Companion Plants and Landscape Inspiration
Gladiolus is a surprisingly versatile garden element. Its upright spikes add architectural height that breaks up the rounder silhouettes of nearby shrubs and perennials.
For a lively cottage-style border, pair gladiolus with other open, graceful flowers. Various poppy varieties bloom earlier in summer, filling the space with soft color until the gladiolus spikes take center stage midseason.
To keep tall stems from toppling, plant coneflowers, black-eyed Susans, or sturdy ornamental grasses nearby. These later-blooming perennials also help hide gladiolus foliage once it starts looking a bit ragged after flowering.
| Border Layer | Recommended Plants | Height | Design & Planting Tip |
| Back Layer | Gladiolus, ornamental grasses, delphiniums, or hollyhocks | 3 to 5 ft (0.9 to 1.5 m) | Plant tallest species at the back, spacing gladiolus corms 6 to 8 inches (15 to 20 cm) apart |
| Middle Layer | Coneflowers, black-eyed Susans, Oriental poppies, or Shasta daisies | 2 to 3 ft (60 to 90 cm) | Group in clusters of 3 to 5 for a natural, layered look |
| Front Layer | Low-growing annuals, creeping herbs, dwarf salvia, alyssum, or creeping thyme | 1 to 1.5 ft (30 to 45 cm) | Plant along the edge to soften lines and suppress weeds |
| Plant Spacing | 12 to 18 inches (30 to 45 cm) between medium and tall plants; 6 to 12 inches (15 to 30 cm) for low border plants | — | Improves airflow and reduces disease pressure |
| Best Garden Size | Borders 4 to 8 feet (1.2 to 2.4 m) deep, medium to large gardens | — | Creates layered depth and a polished, professional look |
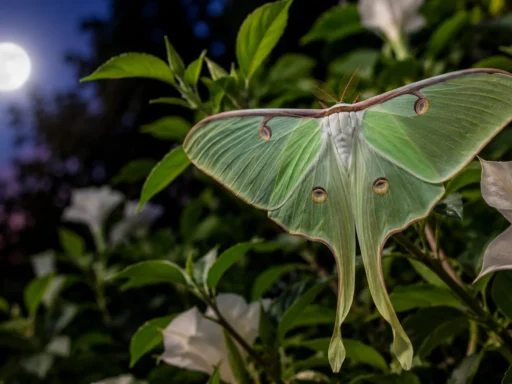
Beyond their visual appeal, gladiolus offer real ecological value. Their open, cup-shaped blooms are highly attractive to hummingbirds and bumblebees, which can easily access nectar at the base of each floret. Pairing gladiolus with other nectar-rich plants helps support pollinators throughout the day, and if you’re also hoping to attract luna moths to your garden, gladiolus fits nicely into that broader pollinator-friendly design.
Troubleshooting Common Gladiolus Problems
Even well-tended gladiolus can run into a few common pests and diseases. Catching issues early makes treatment far more effective.
Pests: The Menace of Gladiolus Thrips
Thrips simplex is the most common and damaging pest gladiolus faces. These tiny, elongated black insects use piercing mouthparts to feed on plant fluids.
- Symptoms: Silver streaks or spots on leaves, buds that fail to open (known as “blind buds”), or papery brown edges on open flowers.
- Prevention and treatment: Apply organic insecticidal soap or neem oil early in the growing season. If thrips have been an issue in the past, soak dormant corms in 110 to 120°F water for two minutes before spring planting to kill overwintering thrips and eggs.
Fungal and Bacterial Diseases
- Corm rot (Fusarium): A soilborne fungus that causes premature yellowing and turns corms into a soft, black mass. Prevent it with excellent drainage and by discarding any soft or diseased corms before planting.
- Botrytis blight: Shows up as brown lesions on leaves and can rot flowers outright. It thrives in damp, crowded conditions, so avoid overhead watering and give plants enough space for good airflow.
Recommended Gladiolus Varieties for Every Garden Goal
The right cultivar depends on your priorities, whether that’s low maintenance, supporting pollinators, or growing show-stopping cut flowers.
Best for Beginners: ‘Passos’ Lavender-purple petals with dramatic dark purple throats and notably sturdy stems that rarely need staking. A forgiving, reliable choice for first-time growers.
Best for Pollinators: ‘Green Lace’ Deeply ruffled, chartreuse-green blooms that draw in native bees and hummingbirds, and look especially striking in the soft light of late afternoon.
Best for Containers: ‘Glamini’ Series Compact hybrids reaching just 12 to 20 inches tall, with unusually stiff, stout stems that hold up flower heads without staking. A great fit for patio pots.
Best for Cut Flowers: ‘Priscilla’ A florist favorite, with large, velvety blooms featuring a cream center, soft yellow throat, and bright pink edging. Reliable in the vase for at least ten days.
Frequently Asked Questions
Do gladiolus come back every year?
Yes, as long as they’re grown within USDA zones 7 through 10. In zone 6 and colder, winter temperatures will kill the underground corms, so gardeners in these areas typically treat gladiolus as annuals or dig up and store the corms indoors over winter.
How deep do you plant gladiolus corms?
Plant large corms 4 to 6 inches deep, and smaller ones 3 to 4 inches deep. This depth helps anchor and support the tall, top-heavy flower spikes as they develop.
Do gladiolus need to be staked?
Many taller varieties benefit from staking, especially in windy spots or when carrying particularly large blooms. Bamboo stakes next to individual plants, or grid supports for larger clusters, both work well.
What should you do with gladiolus after they finish blooming?
Cut off the spent flower spike near the base right away to prevent seed production, which wastes energy. Leave all the green foliage in place, though, since it continues photosynthesizing and storing energy in the corm for next year’s blooms.
Why are my gladiolus buds turning brown and not opening?
This is usually a sign of gladiolus thrips, tiny pests that feed inside developing buds and damage the delicate tissue, causing buds to shrivel, brown, and stay closed.
Can you grow gladiolus in pots?
Yes, as long as the container is at least 12 inches deep with good drainage. Dwarf varieties like the ‘Glamini’ series work especially well in containers, since they’re less likely to make the pot top-heavy.
Are gladiolus toxic to pets?
Yes, gladiolus contain systemic saponins that are toxic to dogs, cats, and horses, with the highest concentration in the underground corms. Ingestion can cause drooling, vomiting, lethargy, and diarrhea, so keep them planted away from areas pets can access.
Conclusion
Growing gladiolus successfully is a genuinely satisfying garden project. Give these sword lilies plenty of sun, well-draining soil, and modest, low-nitrogen feeding, and you’ll be rewarded with a spectacular season of towering summer blooms. Whether you’re cutting them for indoor arrangements or simply enjoying the architectural height they bring to a border, a little planning goes a long way toward your best gladiolus season yet.
Plan access and planting space with our beginner garden planning guide.
When covering soil around plants, consult our garden mulching guide for materials and application advice.