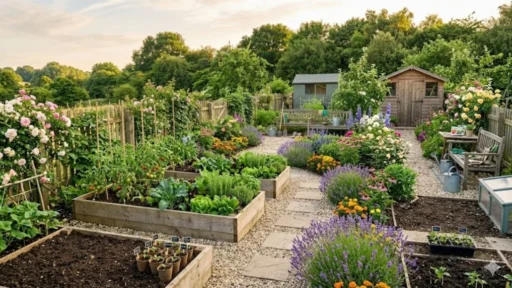

Starting a garden from scratch is easier when you make the decisions in the right order. Begin with the space you actually have, measure its sunlight, decide what you want to grow, and test the soil before buying plants or building beds. A small, well-placed first garden will teach you more than a large plot that is difficult to maintain.
To start a garden from scratch: choose a sunny location near water, decide between containers, raised beds, or an in-ground bed, test the soil, remove competing grass and weeds, add only the amendments the soil needs, choose crops suited to your climate and season, plant according to the seed packet, water deeply when the root zone begins to dry, mulch after the soil has warmed, and check the garden several times each week.
1. Decide What You Want From the Garden
Start with a short list rather than a shopping trip. Do you want vegetables for regular meals, herbs near the kitchen, flowers for pollinators, or a mix? Write down five or six plants your household will actually use or enjoy. That list determines how much sun, space, soil depth, and support the garden will need.
For a first vegetable garden, one small bed or a few large containers is enough. You can expand after you learn how quickly the soil dries, which pests are common in your area, and how much weekly maintenance fits your schedule.
2. Measure the Sun Before Choosing the Site
Watch the proposed area at several points during a clear day. Note when direct sunlight reaches it and when buildings, fences, or trees create shade. Most fruiting vegetables, including tomatoes, peppers, cucumbers, and squash, perform best in strong sun. Leafy greens and some herbs can produce with less, although growth may be slower.
Sun exposure changes during the year, so also look at what may happen when nearby deciduous trees leaf out. If you only have a balcony or patio, check whether railings and walls block afternoon light.
3. Choose Containers, a Raised Bed, or an In-Ground Bed
| Garden type | Best when | Main consideration |
|---|---|---|
| Containers | You have a patio, balcony, rental, or very limited space | Use containers with drainage holes and expect them to dry faster than garden soil. |
| Raised bed | The native soil drains poorly, is compacted, or is difficult to access | It requires purchased soil and may need more frequent watering. |
| In-ground bed | You have usable soil and want the lowest setup cost | Test the soil and remove perennial weeds before planting. |
A raised bed should be narrow enough to reach the center without stepping on the soil. Four feet is a common maximum width when the bed is accessible from both sides; make it narrower if you can reach it from only one side. The University of Minnesota Extension notes that raised beds drain well but can dry faster than in-ground gardens, so easy access to water matters. See its raised-bed guidance for construction and watering considerations.
For a small-space plan, use our beginner garden layout guide to choose a workable shape and spacing plan.
4. Test the Soil Before Adding Fertilizer or Lime
A laboratory soil test can report pH, nutrient levels, and amendment recommendations for your specific soil. In the United States, a county Cooperative Extension office can usually direct you to the appropriate testing service. Sample several spots in the proposed bed and follow the laboratory’s instructions; sampling methods and recommended depth can vary.
Do not add lime, sulfur, or a large amount of fertilizer based only on a guess. Too much of an amendment can create another problem and may take time to correct. Compost improves soil structure and supplies organic matter, but it is not a precise substitute for a soil test. The Oregon State University Extension’s vegetable-gardening guide explains why soil texture, drainage, and organic matter all matter.
Use bagged potting mix in containers. Garden soil becomes dense in pots and can drain poorly.
5. Clear and Prepare the Bed
Remove aggressive perennial weeds before planting, including their roots where possible. For an in-ground bed, loosen compacted surface soil without repeatedly pulverizing wet soil. Working wet soil can damage its structure and leave hard clods after it dries.
If you are converting lawn, you can remove the sod or smother it well before planting. Plain, tape-free cardboard covered with organic material is sometimes used for longer-term bed preparation, but it is not an instant solution when you need to plant immediately. Avoid burying plastic-coated material, labels, staples, or packing tape.
Spread compost according to the soil test or local extension guidance and mix it into the planting zone where appropriate. More compost is not always better; repeated heavy applications can allow phosphorus or soluble salts to build up.
6. Use Local Planting Dates, Not the Calendar Alone
Your USDA Plant Hardiness Zone describes the average annual extreme minimum winter temperature and is mainly useful for judging whether perennial plants can survive winter. It does not give your spring frost date. The USDA Plant Hardiness Zone Map explains what the zone measures.
For annual vegetables, use a reliable local planting calendar and your area’s average last spring frost date. Cool-season crops such as peas, spinach, radishes, and many lettuces tolerate cooler conditions. Warm-season crops such as tomatoes, peppers, beans, squash, and cucumbers are planted after frost risk has passed and conditions have warmed. Penn State Extension provides a helpful explanation of cool-season and warm-season vegetables.
Weather still varies from year to year. Treat an average frost date as a planning guide, then check the short-term forecast before setting tender plants outside.
7. Pick Forgiving Crops You Will Actually Eat
Choose varieties that fit your available space and growing season. The seed packet or plant label should state spacing, planting depth, days to maturity, and light requirements.
| Crop | Why it suits beginners | What to watch |
|---|---|---|
| Leaf lettuce | Quick to mature and can be harvested a few leaves at a time | It can become bitter or bolt in hot weather. |
| Radish | Fast-growing and easy to direct-sow | Crowded seedlings may make small roots. |
| Bush beans | They need no tall trellis and produce in a compact row | Plant after the soil warms. |
| Herbs such as basil or parsley | Useful harvests from a small area | Basil is cold-sensitive; parsley germinates slowly. |
| Cherry tomato | One supported plant can provide a long harvest | It needs full sun, consistent moisture, and a cage or stake. |
Buy healthy transplants for long-season crops if you are starting late. Direct-sow crops that dislike root disturbance or mature quickly. Our beginner garden checklist can help you separate essential tools from optional purchases.
8. Plant at the Correct Depth and Spacing
Follow the seed packet rather than using one rule for every crop. Seeds planted too deeply may not have enough stored energy to reach the surface. Plants crowded together compete for light, water, and airflow, which can also make disease harder to manage.
Water the bed gently after sowing so seeds stay in place. Keep the upper layer evenly moist while seeds germinate, then shift toward deeper, less frequent watering as roots develop. Label each row with the crop and planting date; this simple step prevents you from mistaking slow seedlings for weeds.
9. Water According to the Soil and Weather
There is no universal schedule that works for every garden. Temperature, wind, rainfall, soil texture, plant size, and whether you use containers or raised beds all change how quickly the root zone dries.
Check below the surface rather than judging by a dry-looking crust. Water thoroughly when the soil in the active root zone is beginning to dry, then let excess water drain. Apply water near the soil to reduce leaf wetness and soil splash. Containers may need checking every day during hot or windy weather, while an in-ground bed may hold moisture longer.
For troubleshooting and watering methods, read how to water a vegetable garden without overwatering.
10. Mulch, Observe, and Keep Simple Records
After seedlings are established and the soil has warmed, add an appropriate mulch around the plants while keeping it away from stems. Mulch can reduce evaporation and suppress weeds, but a thick layer on cold spring soil may delay warming. It may also provide hiding places for slugs in damp gardens. Our guide to garden mulch types and common mistakes explains how to choose and apply it.
Walk through the garden two or three times a week. Look under leaves, pull small weeds before they seed, check soil moisture, and note changes. A short record of planting dates, varieties, weather problems, and harvests will make next year’s garden much easier to plan.
A Practical First-Garden Timeline
- Before planting: measure sunlight, select the site, test the soil, and draw a basic layout.
- Planting week: prepare the bed, install supports, sow or transplant, label rows, and water gently.
- Weeks 1–2: keep the seed zone from drying out, thin crowded seedlings, and watch for early pest damage.
- Weeks 3–4: shift to deeper watering, add mulch when conditions are suitable, and replace failed plants only if enough growing season remains.
- Through the season: weed regularly, support climbing or fruiting crops, harvest on time, and record what worked.
Common Mistakes When Starting a Garden
- Building a large garden before learning how much maintenance it requires
- Choosing plants before measuring the site’s direct sunlight
- Adding lime or fertilizer without knowing what the soil needs
- Planting warm-season crops according to a generic month instead of local conditions
- Crowding plants because seedlings initially look small
- Watering by a fixed calendar without checking the soil
- Ignoring mature plant size and placing tall crops where they shade shorter ones
Frequently Asked Questions
What is the easiest way to start a garden from scratch?
Begin with one small container group, raised bed, or in-ground bed in a location with suitable sunlight and convenient access to water. Test the soil, choose a few crops that match the season, and follow their planting instructions.
How much space does a beginner garden need?
You can learn with several containers or a bed as small as 4 by 4 feet. The best size is one you can reach easily and inspect several times each week. Expansion is easier than recovering an oversized, neglected plot.
Should I use seeds or transplants?
Use transplants when a crop needs a long warm season or when you want a head start. Direct-sow quick crops and plants that do not transplant well. Local planting calendars and seed packets provide crop-specific guidance.
Can I start a garden without a yard?
Yes. Many herbs, leafy greens, peppers, and compact tomato varieties grow in containers. Use a container with drainage holes, a potting mix made for containers, enough rooting space for the crop, and a location with suitable light.
What should I buy first?
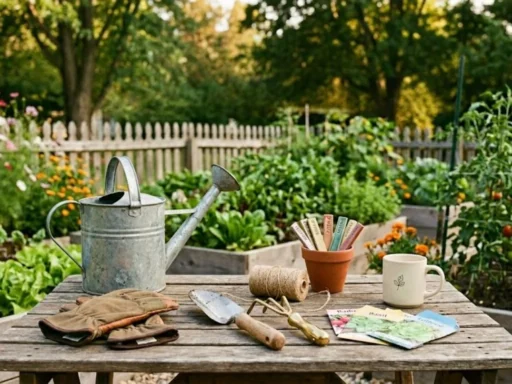
Start with seeds or healthy plants, appropriate soil or amendments, containers if needed, a hand tool, gloves, labels, and a reliable way to water. Trellises or cages should be installed early for crops that need support.
Your First Step Today
Spend one clear day measuring sunlight in the space you are considering. Record what you see in the morning, around midday, and later in the afternoon. That observation will narrow your plant choices and prevent many expensive setup mistakes before they happen.